Field Notes on Pivoting Your Brand | Part 3 | Let’s get Designy
We're jumping into the DESIGN portion of re-branding your business! Before I show you some screenshots and get into the actual design, I want to start out with a note about visually branding a personal brand vs a business, because they're very different.
When you're crafting visuals for your personal brand I think you need to take a different approach than if you were branding for a separate business.
Originally when I was working on the design direction for my re-brand I had a different vibe on the go, because I was intending it to live under Good as Gold Studio at that point, but when I pivoted back to a personal brand that needed to change. The biggest difference here is that when you're designing your shit for a PERSONAL BRAND, aka YOU, (or your client) it has to feel like YOU and represent your vibe as a person.
When you're visually branding a separate business entity I think that requires a different approach that isn't rooted in 'does this feel like you', because it's not focused on you at that point... It's something you've built beyond your name, and you need to remove yourself from it, even just a little.
But, this is the beauty of a personal brand that I find really fun and it's something I was stoked to dive into. It's also why you might have seen me pivot the design direction I was working on for Good as Gold, when I changed direction back to using my own name... Because it had to. I actually kept the fonts I was using (and introduced a new one), but the colours & design direction changed a little.
So in the name of this series & just sharing the BTS of this whole journey, I thought I'd include a few very early screenshots of my designs I was working on...
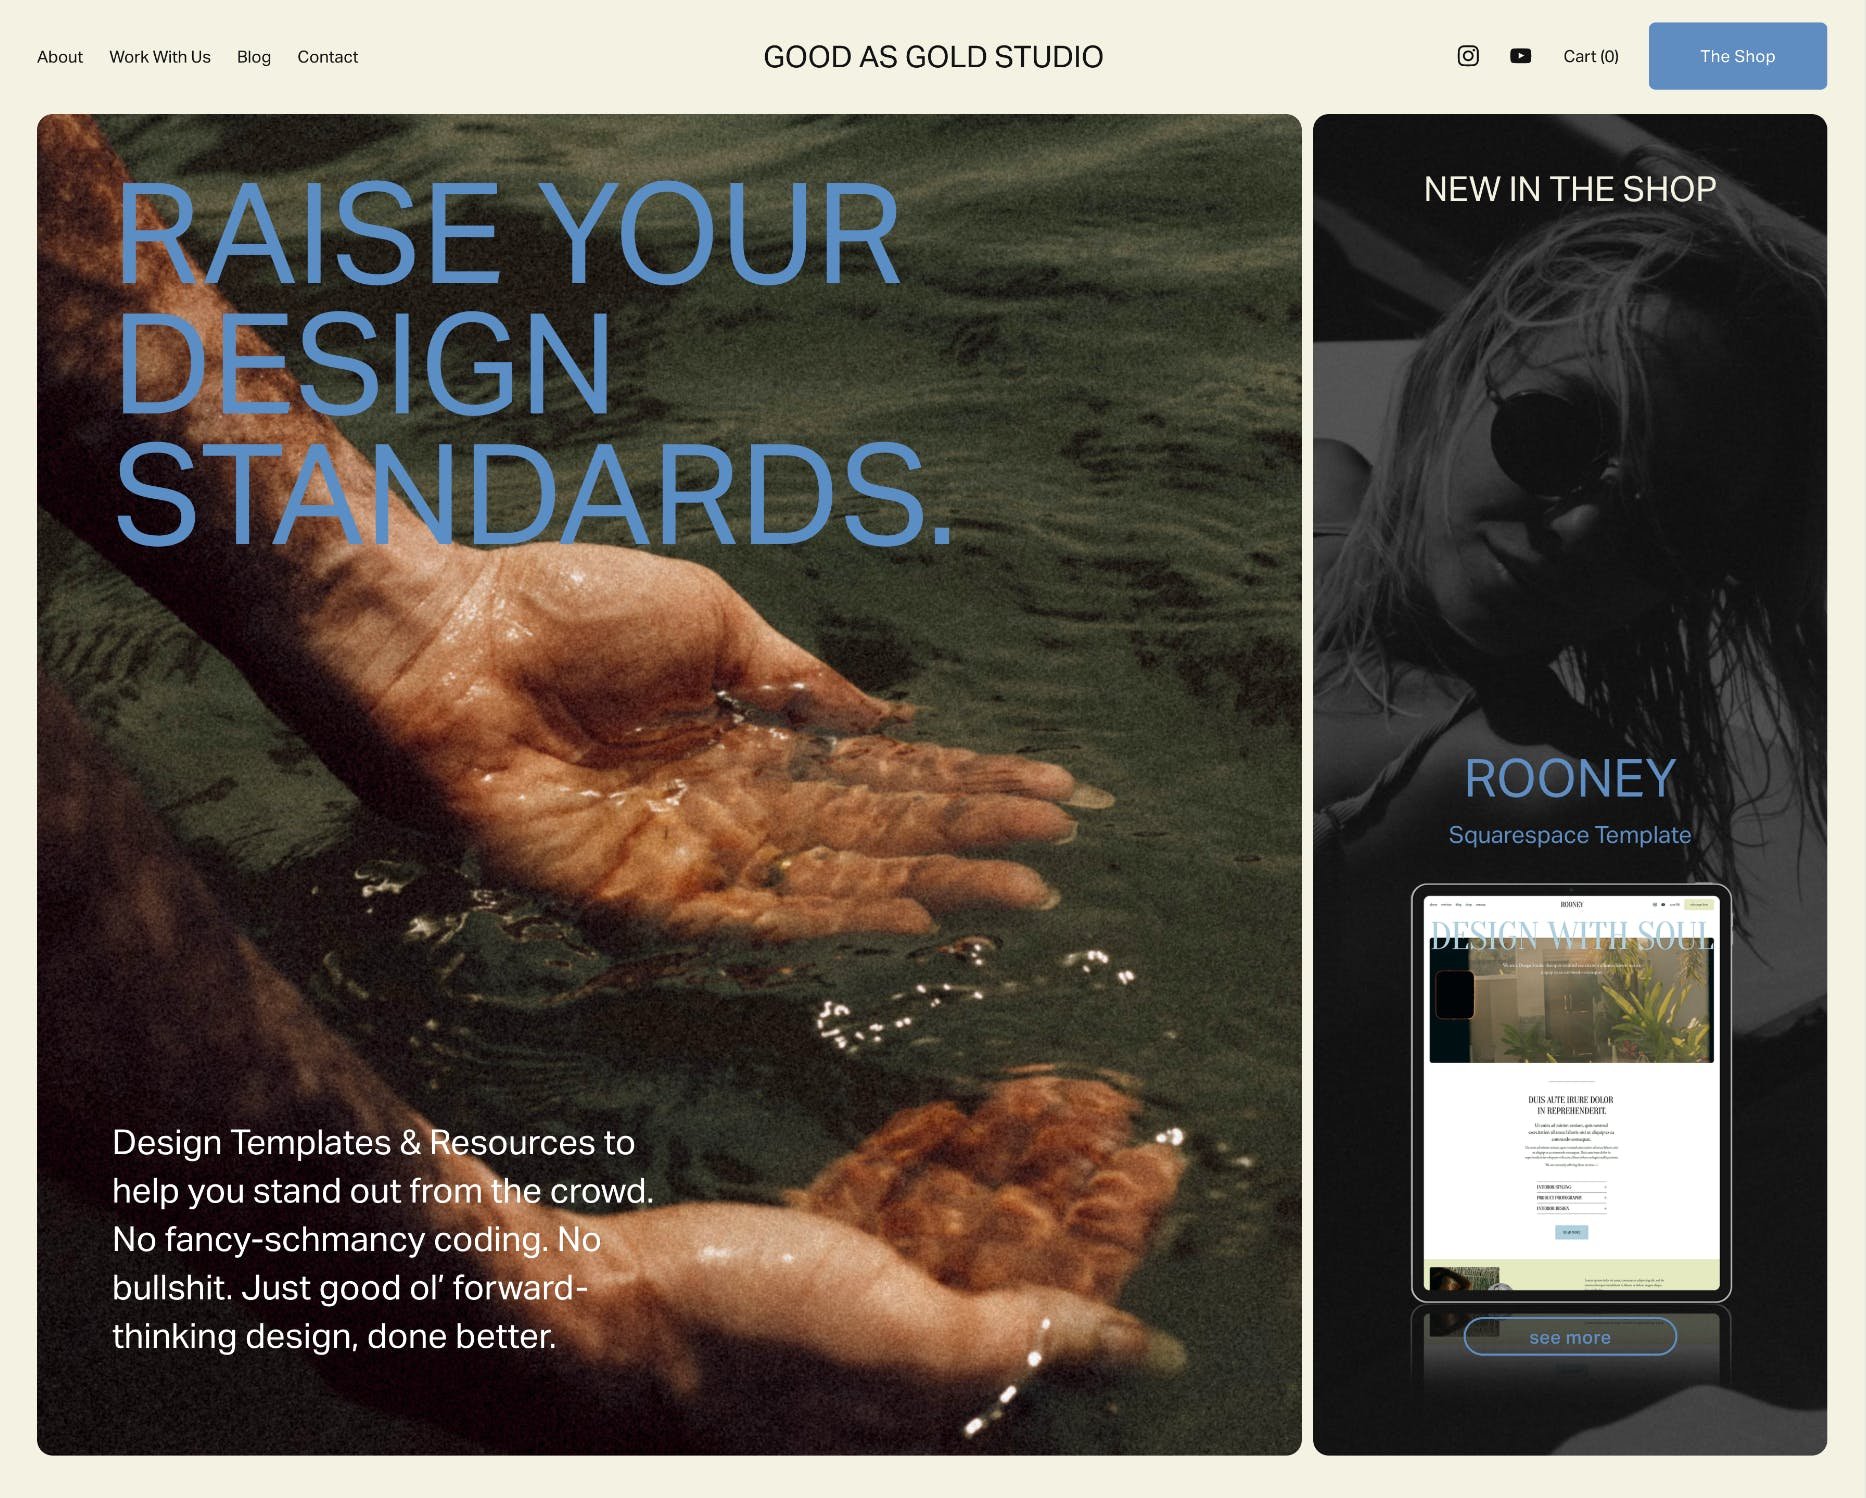
The OG website mockup —
This was the *very* first design I did when I started scheming on the entire re-brand, back when it was still going to be under Good as Gold. I actually still really dig this layout, and also this blue colour, so I may introduce it to my branding now if I feel like I need a secondary colour to the yellow.
Some more refined mockups —
These were the colours I was going to go for, I still REALLY love them so I might have to use them on the next Squarespace Template or something, the gold and the bright orange are such a sick combo, but they didn't work for where I wanted to go with my personal brand.

BTS — My (Updated) Visual Inspo
Alright, arguably the best part of this entire process, especially for a designer! This can only really come to life properly when you've done all of the other Branding strategy work to get here. If you skip that part and jump straight into the visuals, you'll likely need to re-do all of this shit again very soon.. aka, not ideal.
Visual inspo should always start out messy AF to be honest, it’s not important to get it perfect right off the bat. Just throw everything together that feels like it relates back to the strategy and the brand, THEN slowly duplicate that inspo and refine it over and over.
I’ll add my main 3 versions of my inspo here, starting with the messy first draft, and the 3rd and final one! To be honest my inspo somehow almost always ends up being more photography-based than design-based, haha, but photography is a massive part of my work/my brand, so it makes sense because I want to, and need to really nail the vibe of the photos I’m using.
Because I'm moving back to this being a personal brand I really want it to incorporate all the shit I love and feel like is my brand — from design, to creativity, to thoughts on biz, to adventure, to photography, and everything in between.
Here's my inspoboards —
Re-Brand Visual Inspo v1
The very messy first draft.

Re-Brand Visual Inspo v2
A little more refinement... Starting to narrow down the vibe.

Re-Brand Visual Inspo v3 (Final Version)
Fully refined inspo, I like to keep the final version very minimal, max 9-12 pieces of design/photography.

A couple notes on this final inspo & what I'm going for — these green and blue tones here are already a big part of my vibe tbh, and I know this because friends will tell me when they see images like those crispy Canadian blue glacier lakes or green forests, it looks like my vibe, haha.
With that in mind, using this slightly muted yellow works pretty damn well with those cool tones... and it has absolutely nothing to do with Wes Anderson, I promise, LOLS. Aside from that, I'm really going for crispy clean photos paired with some simple layers & cool type. (Aka my usual vibe?! Ha)
And just to see how it came to life in comparison to the original inspo, here's a couple quick screenshots from the website —

A few things to consider for your Branding VISUALS —
Get clear on how you want your brand to FEEL. This goes for you whether you're a personal brand, or a business brand. Do you want it to feel fresh and crispy or bold and edgy? This will majorly help you in the design direction so this is important. e.g. Here's what I wrote for my branding — "Confident and laid back. Fresh. Ignited. Unapologetic. It feels like the first dunk of the summer on a toasty day. Refreshing AF and you cant wait for more... Like an extension of me."
What kind of stock photography might you need to support any photoshoot you’re doing? And how can you curate that down to feel extremely on-brand? e.g. For me, I’ve used a big range of stock photography for YEARS, including a lot of tropical-ish photos of leaves/palms/etc, and while visually I still love that look, I want my branding to feel even MORE cohesive now. So instead of really tropical greens, I want to use more earthy greens, like shit you’d see in British Columbia (where I live), or even a little New Zealand (my homeland). Thats at the top of mind when I’m choosing photos, does this look & feel like BC, or NZ? Or hard pass on either?
If you're choosing to be very conscious of the photography you choose (which I hope you are!), consider what colours will work well with the tones of the images you're choosing — don't automatically assume because you love blue that your brand colour & ALL of your shit — from the photos to your clothes to your brand colour — should be blue. Because my photography has a lot of those green & blue tones that I love, I most def do NOT want those to also be my brand colours, because they can live through the photography, and the yellow I chose is the complementary colour that works well with those tones and can also stand alone. Hopefully that makes sense!
If certain colours aren’t working, but you feel like they’re close, play with the TONE of the colour. Maybe it’s too bright, or too dull, too cool/warm, etc. At first I was using a really bright yellow and it was just a bit too intense, so I made it a tiny bit more pastel and it just fit sooo much better.
Keep in mind that you may actually want to adjust the colours once you start designing & building your brand. When you see things in context, sometimes shit just has to change. Even with client projects in the past, while we might have worked on colours and approved them in the initial phase of the project, you gotta be able to adapt and say ‘hey, there’s something better we can do here’, when you pull together all the brand elements and realise something needs to shift.
Side note, but I do have an entire post in this series on Photography alone, which will include a lot of details about planning your own photoshoot, so that will be Part 5!